import roads plug-in step by step procedure:
Daylon Leveller 2.5 introduced the roads plug-in which allows the use of Adobe Illustrator™ files to define road splines and create smooth pathways in the terrain file. The Leveller help file explains the pertinent features of the plug-in and this tutorial is intended to demonstrate a use of the import roads plug-in within the context of a typical DEM modeling workflow.
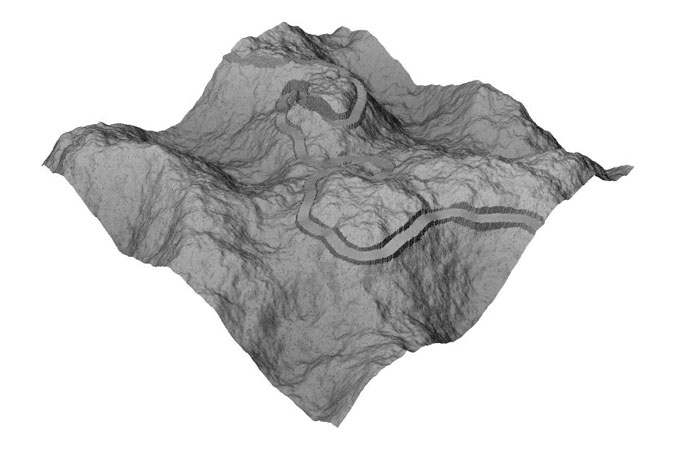
Let's start with an illustration of the tutorial's final result. This is a render made from the gForge_2.0_128_00000.ter file found in the download .zip pack:
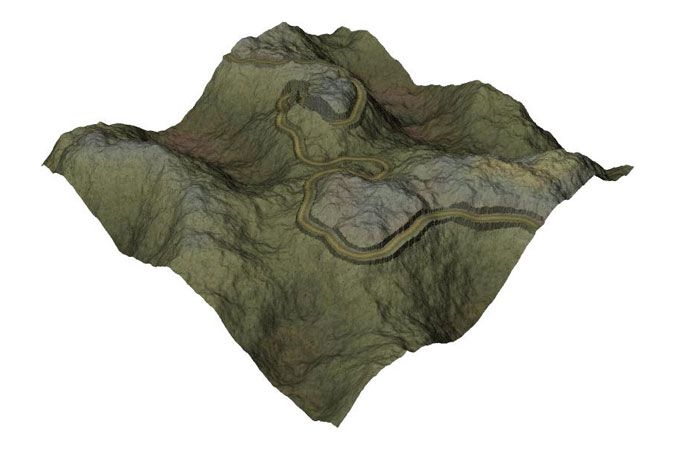
The following is a step by step procedure for creating the terrain displayed above:
Create and save a new .ter file in Daylon Leveller. You can use the roads_tut.lvw file included in the .zip pack to set your view to something similar to the view used while creating this tutorial.
Choose Edit/Resize Grid and select a 512x512 grid size for this tutorial. You can use any size with your projects but the examples included in the download .zip pack were prepared to work on a 512x512 sized grid.

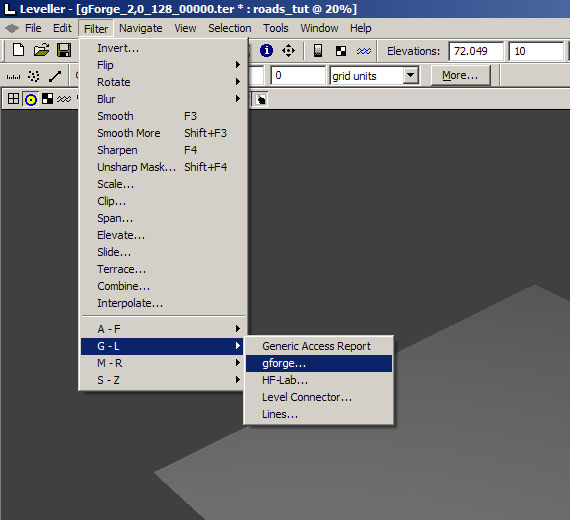
Create a natural look for the terrain. You can do it many ways but this tutorial uses the gForge filter because it's fast an easy. Select the gForge filter as shown below.
Use these settings: Roughness = 2.0, Maximum Elevation = 128 grid units, Random Seed = 00000.

Here's the result of applying the gForge filter:

The terrain looks natural and detailed
At this point it is time to take some time to study the terrain and plan the best location for the roadways and/or paths. The way I do this is by exporting a 8bit .bmp DEM file for use in Adobe Photoshop™ and Adobe Illustrator. Here's what it looks like:

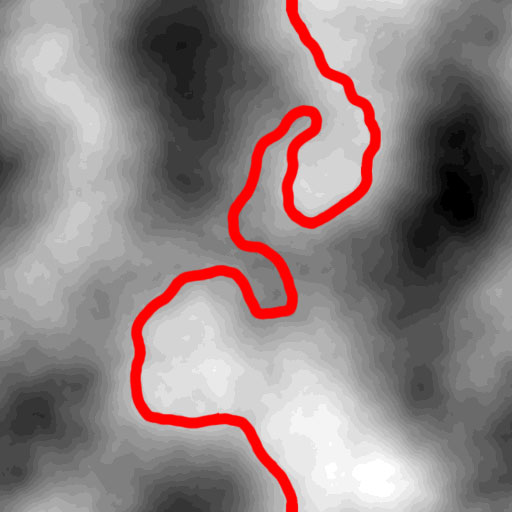
The .bmp is very detailed. It can be confusing to interpret the elevation data when the DEM is this detailed. It's possible to Posterize the data to 25 steps and make the map much easier to read. In Photoshop run the Adjust/Posterize/25 colors to get a DEM image that looks like this:

After careful consideration and lots of sketching the roadway seems to fit into the existing terrain along the path shown here:
.
Now that there is a basic plan for the roadway it's time to create a Adobe Illustrator file and prepare the .ai file as per the instructions in the Leveller plug-in help files. You can "place" the DEM image in the .ai file and trace or draw the path for the roadway. The TEST_roads_ai-v8.ai file is included in the downloadable .zip pack. Here is a screen shot from Adobe Illustrator:
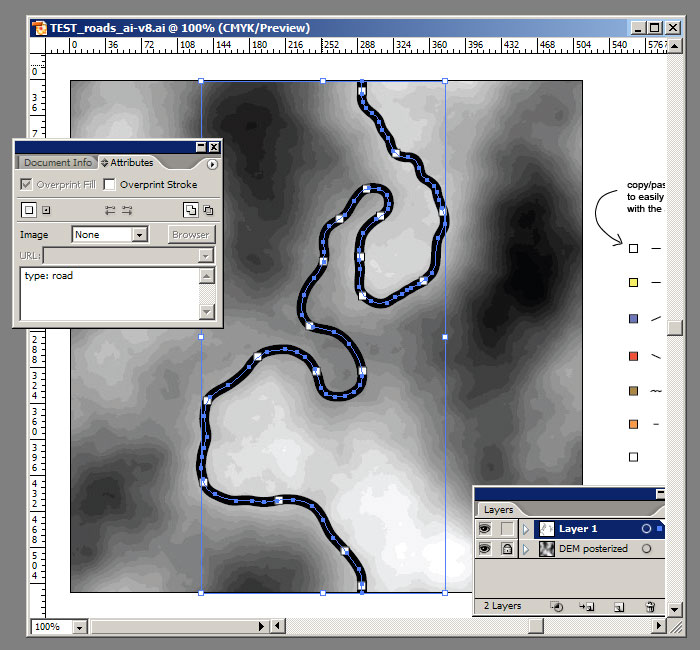
Look at the rulers... .the document size of the .ai file is 512x512, which matches the grid size of the Leveller project. The TEST_roads_ai-v8.ai file is ready to use in Leveller for this tutorial but you may want to use copies as a sample or template to modify for your own projects.
The plug-in works with Illustrator 8 formatting. If you work with more recent versions of Adobe Illustrator be sure to "save as" and choose legacy v8 formatting when saving your modifications.
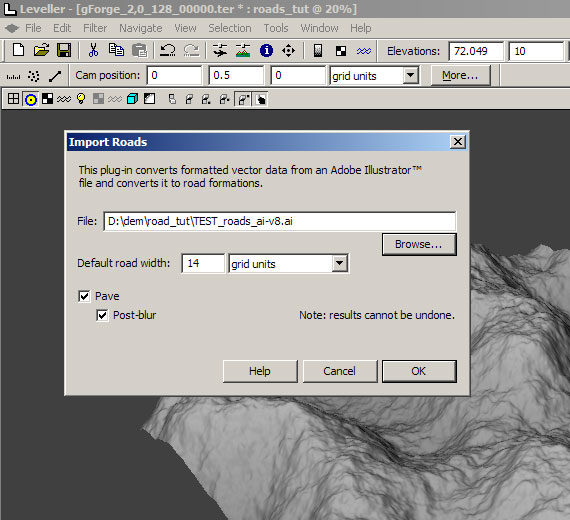
Now it is time to resume working with Leveller. Choose File/Import/Roads as shown below:

Complete the dialog by locating your .ai file. Browse and select the TEST_roads_ai-v8.ai file included in the download .zip pack. Set the road width to 14 grid units for this project. Check the Pave and Post-blur boxes as shown.
Here is a render of the terrain after the import roads plug-in has processed:
The roadway looks more realistic with the addition of a simple texture map: